Thursday, 26 May 2016

Ansible installation_and_its_setup

How to install ansible on our machines:
-----------------------------------------

1) Yum install epel-release
2) yum install ansible

To write commands in Ansible"

ansible 127.0.0.1 -m yum -a "name=software state=present" 

Then the software will be installed on your machine.

eg:
installing postgresql using ansible

ansible 127.0.0.1 -m yum -a "name=postgresql state=present"


---
- hosts: [target hosts]
  remote_user: [yourname]
  tasks:
    - [task 1]
    - [task 2]

Sample service check playbook


---
- hosts: [marketingservers]
  remote_user: webadmin
  tasks:
    - name: Ensure the Apache daemon has started
      service: name=httpd state=started
      become: yes
      become_method: sudo


Playbook task
tasks:
    - name: Ensure the Apache daemon has started
      service: name=httpd state=started
      become: yes

      become_method: sudo


Wednesday, 25 May 2016

Runtime_issues and resolutions

error :/bin/sh^M: bad interpreter: No such file or directory


This can be resolved by using these steps:

To fix this, open your script with vi or vim and enter in vi command mode (key ESC), then type this:
:set fileformat=unix
Finally save it
:x! or :wq!

Thursday, 19 May 2016

DevOps_automation_scripts

DevOps_Automation_Scripts
---------------------------
Jenkins installation script:
jenkins.sh 
#!/bin/sh
sudo wget -O /etc/yum.repos.d/jenkins.repo http://pkg.jenkins-ci.org/redhat/jenkins.repo
sudo rpm --import https://jenkins-ci.org/redhat/jenkins-ci.org.key
sudo yum install jenkins
service jenkins start

chmod 755 jenkins.sh
./jenkins.sh
It will jenkins latest version.
Scripts

cp jenkins /etc/init.d/
update rc.d jenkins defaults
Now this will considered within in the init.d service and restart the service automatically whenever reboot machine.


DevOps interview questions

DevOps interview questsions:
--------------------------------

1) What are the build tools you are using and how you can create artifacts and where are you keeping the artifacts?

In our project we are using Maven build tool which has project management and build capability.
our build team generates the artifacts(war or jar or ear) then we will store it in the Nexus Repository and from there deployment team will take the war file and deploy it on tomcat, jboss, weblogic or WAS based on their requirement.

2) What are the various continuous integration tools are available in the market? which one you are using?

Jenkins
Cruise Control
Bamboo
Travis
Team City

we are using Jenkins for continuous integration which is helping us for continuous build as well as continuous integration purpose.

3) What is DevOps all about ?

DevOps is the combination of development and Operations team which will help the project team to stream line their process or optimize their process with respect to communication, collaboration, Integration and automation.

4) How can you make sure that developer machine is equal to your stg, qa and production machines?

Using docker container tool we will create all the environments and test our application on all these environments.

5) What is the puppet?
Puppet is one of the popular confiugration management tools, which will help us to automate the server software installation and its configuration.

6) What are the puppet manifests?
Puppet manifests contain the resources,are basic building blocks of system/server.

7) Where can you find the puppet ssl certificates?
Puppet ssl certificates are stored in /var/lib/puppet/ssl , this path is available in puppet.conf and path can be changed.

8) What is default port for puppet?
default port is 8140

9) what is puppet modules?
Puppet module is collection of puppet manifests files, static files, templates, libraries, facter etc.

10) What is facter?
Facter is information about the server/machine that we are going to configure.

11) What are the monitoring tools are available in the market?
Nagios, Zebbix, Zeboss, Sensu, UCD, New Relic.

12) How can you setup puppet master and puppet agent architecture?
In Puppet master: we have to install yum install puppetmaster
In Agent: Puppet client should be installed and it should be certified by the puppet master.
All puppet certificates are available in the /var/lib/puppet/ssl

13) What are Docker usecases?
Docker use cases are plenty, it is mainly focuses on the developer productivity, and improve the developer testing capability to test the applications on different environment without changing the system because docker works within the operating system.
It allows the developer to deploy the code faster comapared to any other tools.
Becuase of containerization you can start easily stop,start and restart easily.

14) What is continuous Delivery and why it is imporant?
Continous delivery involves continuous build and continous deployment in all the environments without any manual intervention.
Each and every developer update immediately will go to the delivery without any manual intervention.

15) what is the version control tool you are using in your project?
In our project we are using Git open source software version control system for all our source code.

16) What is main difference between hypervisor and container?
Hypervisor is hardware level virtualization and where as container operating system level virtualization.

17) What are the installation types in Puppet?
Puppet Enterprise
Pupperforge
Masterless puppet

18) What are the docker advantages?
Easy to create and share the images
Images run the same way in all the environments, which has great benefit to replicate same code in all the environments.
Easily run the entire stack in dev
Minimal overhead
Better resource utilization
Disadvantage:
to manage persistent data is somewhat difficult.

19) What is Terraform?
Terraform is a tool to provision the infrastructure

20) What is git stash command?
Git stash command will help you to save the data currently you are working on.
eg: if you edit one file and updating file and immediately some reason you git checkout otherbranch.
whatever updates you have done in this current location will go away if you do not stash it.

Sunday, 15 May 2016

Nagios installation and its setup without Docker

How To Install Nagios On CentOS 6

Step 1 - Install Packages on Monitoring Server

rpm -Uvh http://dl.fedoraproject.org/pub/epel/6/x86_64/epel-release-6-8.noarch.rpm
rpm -Uvh http://rpms.famillecollet.com/enterprise/remi-release-6.rpm
yum -y install nagios nagios-plugins-all nagios-plugins-nrpe nrpe php httpd
chkconfig httpd on && chkconfig nagios on
service httpd start && service nagios start
We should also enable SWAP memory on this droplet, at least 2GB:
dd if=/dev/zero of=/swap bs=1024 count=2097152
mkswap /swap && chown root. /swap && chmod 0600 /swap && swapon /swap
echo /swap swap swap defaults 0 0 >> /etc/fstab
echo vm.swappiness = 0 >> /etc/sysctl.conf && sysctl -p

Step 2 - Set Password Protection

Set Nagios Admin Panel Password:
htpasswd -c /etc/nagios/passwd nagiosadmin
Make sure to keep this username as "nagiosadmin" - otherwise you would have to change /etc/nagios/cgi.cfg and redefine authorized admin.
Now you can navigate over to your droplet's IP address http://IP/nagios and login.
You will be prompted for password you set in Step 2:
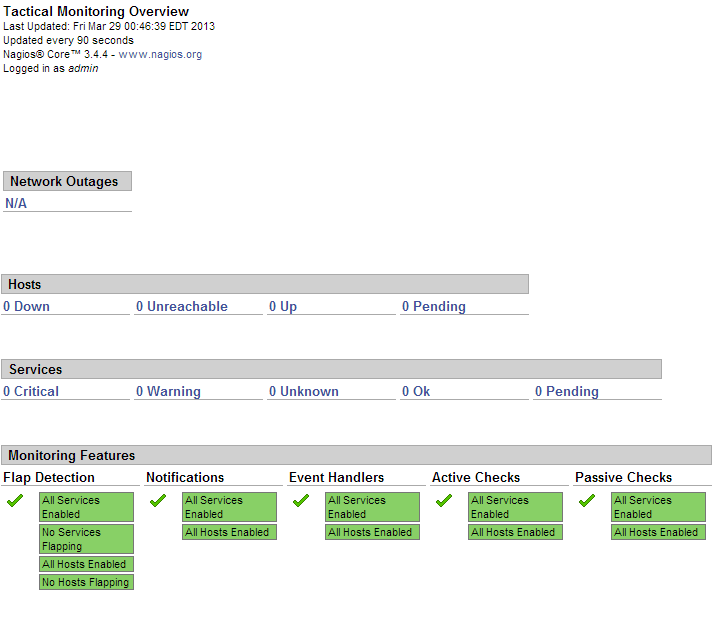
This is what the Nagios admin panel looks like:
Since this is a fresh installation, we don't have any hosts currently being monitored.
Now we should add our hosts that will be monitored by Nagios. For example, we will use cloudmail.tk (198.211.107.218) and emailocean.tk (198.211.112.99).
From public ports, we can monitor ping, any open ports such as webserver, e-mail server, etc.
For internal services that are listening on localhost, such as MySQL, memcached, system services, we will need to use NRPE.

Step 4 - Install NRPE on Clients

rpm -Uvh http://dl.fedoraproject.org/pub/epel/6/x86_64/epel-release-6-8.noarch.rpm
rpm -Uvh http://rpms.famillecollet.com/enterprise/remi-release-6.rpm
yum -y install nagios nagios-plugins-all nrpe
chkconfig nrpe on
This next step is where you get to specify any manual commands that Monitoring server can send via NRPE to these client hosts.
Make sure to change allowed_hosts to your own values.
Edit /etc/nagios/nrpe.cfg
log_facility=daemon
pid_file=/var/run/nrpe/nrpe.pid
server_port=5666
nrpe_user=nrpe
nrpe_group=nrpe
allowed_hosts=198.211.117.251
dont_blame_nrpe=1
debug=0
command_timeout=60
connection_timeout=300
include_dir=/etc/nrpe.d/
command[check_users]=/usr/lib64/nagios/plugins/check_users -w 5 -c 10
command[check_load]=/usr/lib64/nagios/plugins/check_load -w 15,10,5 -c 30,25,20
command[check_disk]=/usr/lib64/nagios/plugins/check_disk -w 20% -c 10% -p /dev/vda
command[check_zombie_procs]=/usr/lib64/nagios/plugins/check_procs -w 5 -c 10 -s Z
command[check_total_procs]=/usr/lib64/nagios/plugins/check_procs -w 150 -c 200
command[check_procs]=/usr/lib64/nagios/plugins/check_procs -w $ARG1$ -c $ARG2$ -s $ARG3$
Note:
In check_disk above, the partition being checked is /dev/vda - make sure your droplet has the same partition by running df -h / You can also modify when to trigger warnings or critical alerts - above configuration sets Warning at 20% free disk space remaining, and Critical alert at 10% free space remaining.
We should also setup firewall rules to allow connections from our Monitoring server to those clients and drop everyone else:
iptables -N NRPE
iptables -I INPUT -s 0/0 -p tcp --dport 5666 -j NRPE
iptables -I NRPE -s 198.211.117.251 -j ACCEPT
iptables -A NRPE -s 0/0 -j DROP
/etc/init.d/iptables save
Now you can start NRPE on all of your client hosts:
service nrpe start

Step 5 - Add Server Configurations on Monitoring Server

Back on our Monitoring server, we will have to create config files for each of our client servers:
echo "cfg_dir=/etc/nagios/servers" >> /etc/nagios/nagios.cfg
cd /etc/nagios/servers
touch cloudmail.tk.cfg
touch emailocean.tk.cfg
Edit each client's configuration file and define which services you would like monitored.
nano /etc/nagios/servers/cloudmail.tk.cfg
Add the following lines:
define host {
        use                     linux-server
        host_name               cloudmail.tk
        alias                   cloudmail.tk
        address                 198.211.107.218
        }

define service {
        use                             generic-service
        host_name                       cloudmail.tk
        service_description             PING
        check_command                   check_ping!100.0,20%!500.0,60%
        }

define service {
        use                             generic-service
        host_name                       cloudmail.tk
        service_description             SSH
        check_command                   check_ssh
        notifications_enabled           0
        }

define service {
        use                             generic-service
        host_name                       cloudmail.tk
        service_description             Current Load
        check_command                   check_local_load!5.0,4.0,3.0!10.0,6.0,4.0
        }
You can add more services to be monitored as desired. Same configuration should be added for second client, emailocean.tk, with different IP address and host_name:
This is a snippet of /etc/nagios/servers/emailocean.tk.cfg:
define host {
        use                     linux-server
        host_name               emailocean.tk
        alias                   emailocean.tk
        address                 198.211.112.99
        }

...
You can add additional clients to be monitored as /etc/nagios/servers/AnotherHostName.cfg
Finally, after you are done adding all the client configurations, you should set folder permissions correctly and restart Nagios on your Monitoring Server:
chown -R nagios. /etc/nagios
service nagios restart

Step 6 - Monitor Hosts in Nagios

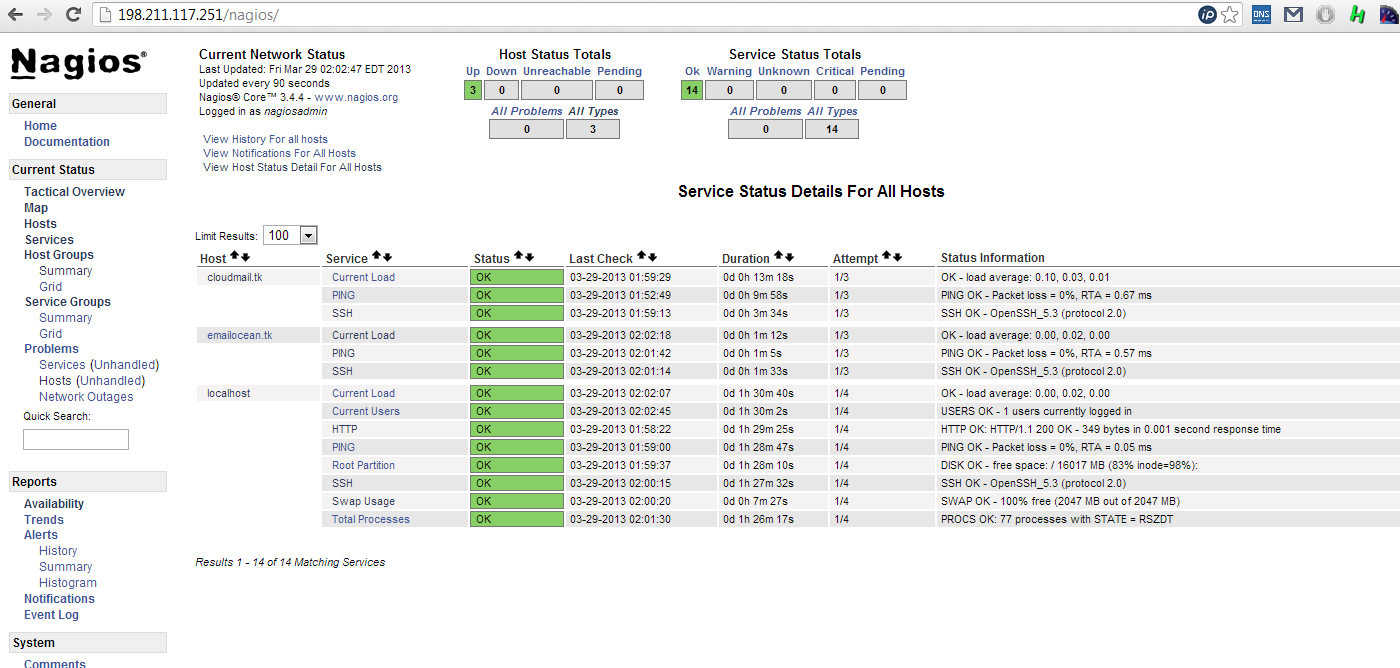
Navigate over to your Monitoring Server's IP address http://IP/nagios and enter password set in Step 2.
Now you should be able to see all the hosts and services:
And you are all done!

nagios.sh
---
rpm -Uvh http://dl.fedoraproject.org/pub/epel/6/x86_64/epel-release-6-8.noarch.rpm
rpm -Uvh http://rpms.famillecollet.com/enterprise/remi-release-6.rpm
yum -y install nagios
yum -y install nagios-plugins-all 
yum -y install nagios-plugins-nrpe 
yum -y install nrpe 
yum -y install php 
yum -y install httpd
chkconfig httpd on && chkconfig nagios on
service httpd start && service nagios start

creating password for nagios admin:

htpasswd -c /etc/nagios/passwd nagiosadmin

nrpe.sh
---
rpm -Uvh http://dl.fedoraproject.org/pub/epel/6/x86_64/epel-release-6-8.noarch.rpm
rpm -Uvh http://rpms.famillecollet.com/enterprise/remi-release-6.rpm
yum -y install nagios
yum -y install nagios-plugins-all
yum -y install nrpe
chkconfig nrpe on
-----------
serverconfig.sh
---------------------
echo "cfg_dir=/etc/nagios/servers" >> /etc/nagios/nagios.cfg
cd /etc/nagios/servers
touch cloudmail.tk.cfg

touch emailocean.tk.cfg

nano /etc/nagios/servers/cloudmail.tk.cfg


Tuesday, 10 May 2016

Vagrant and its setup

Getting started with Vagrant
Let’s take a quick tour of Vagrant and show you how to install and get your first box configured using Puppet. First, we need to install Oracle’s Virtual Box virtualization platform. Download and install an appropriate package for your host. There are packages for Linux, OSX, Windows and Solaris. Here we’ll install the package for Red Hat Enterprise Linux 6.
(Note: If you cannot install VirtualBox 4.x then note that VirtualBox 3.x versions only work with Vagrant 0.6.9 and earlier)
You will also need Ruby and RubyGems which you can easily install from your platform’s package manager (if they are not already installed), for example on RHEL 6 again:
$ sudo yum install ruby rubygems
Then using RubyGems you can install Vagrant itself:
$  sudo gem install vagrant
Vagrant relies on the concept of base boxes that you can download and then work with. To download one or more of them, refer to this list of the available boxes.
We’re going to download a base Ubuntu box as a start using the vagrant box command. First, create a directory:
$ mkdir /home/james/vagrant && cd /home/james/vagrant
Then add our Vagrant box:
$ vagrant box add lucid32http://files.vagrantup.com/lucid32.box
This will download a Lucid 32-bit (Ubuntu version 10.04 LTS) base box called lucid32. We can then initialize this box using the init command:
$ vagrant init
This will add the box to Vagrant and prepare it for start-up. We can then start it with the following command:
$ vagrant up
This will configure the Vagrant box and bring it up and make it available for use. Once it’s configured we can connect to it using the ssh command.
$ vagrant ssh
This will SSH into the vagrant box and you can interact and manage it like any other virtual machine. If you want to shut down your Vagrant box you have two options. The first suspends it:
$ vagrant suspend
This pauses the virtual machines and you can naturally resume it like so:
$ vagrant resume
But important you can also have a complete do-over and destroy your box:
$ destroy vagrant
This will reset the box back to its original configuration.  Any changes you made to the box or data you placed on it will be lost.  But similarly anything you broke developing or testing on it will also be magically returned to a pristine state ready to start again.  You can quickly see how this can become a powerful tool for testing and prototyping.
But often there will be more unique boxes to configure, or you may want a fast way to build a Vagrant box up to an appropriate state to do some testing. We can do this using some simple Puppet code. Vagrant supports using Puppet either in its solo mode (without a server) or in client-server mode. We’re going to use it in solo mode for this case. 
To get started create a directory called manifests in the vagrant home directory (/home/james/vagrant):
$ mkdir /home/james/vagrant/manifests
Then create a Puppet manifest in this directory, naming the manifest file with the name of the box we’re going to configure, in our case lucid32.pp. This is configurable in Vagrant but this is the common default. You could also use existing Puppet manifests if you have those -- a fast way of replicating a production host as a Vagrant virtual machine.
$ touch /home/james/vagrant/manifests/lucid32.pp
And add a simple manifest inside the file:
class lucid32 {
  package { "apache2":
    ensure => present,
  }

  service { "apache2":
    ensure => running,
    require => Package["apache2"],
  }
}

include lucid32
This manifest will install the Apache package and start the Apache service.
We now need to enable Puppet inside Vagrant’s configuration file, called Vagrantfile. This file will be in our /home/james/vagrant directory and we need to open it and edit the content to add the following lines:
Vagrant::Config.run do |config|
...
  # Enable the Puppet provisioner
  config.vm.provision :puppet
end
The key line being config.vm.provision :puppet. This tells Vagrant to use Puppet. It also installs Puppet on the base box you just downloaded - in this case it and many of the other base boxes available also have Puppet installed (you can create your own boxes).
Now we can bring our Vagrant box back up:
$ vagrant up
Or if the Vagrant box is already running then you can initiate provisioning like so:
$ vagrant reload
This will load and execute Puppet and the manifest file you have specified, and configure the box by installing Apache and starting the Apache service. Vagrant uses VirtualBox port forwarding to forward port 80 (HTTP) by default so you should be able to browse to that port on the local host and see the default Apache page. You can also configure additional ports to forward.
Now you have a fast, easy virtual environment to conduct whatever testing or prototyping required. There is more information on how to use Vagrant on the software's website.
In windowds Install the vagrant from http://www.vagrantup.com/downloads
After Vagrant installation, you have to install the virtual box, which is provider for vagrant box.
Now you can go to vagrant boxes from vagrantup.com and execute below command
vagrant init box_name 
vagrant box add newname box_name or URL
After executing the above command you will see the Vagrant file on the directory wherever you executed.
Now you have to say : vagrant up ( box will be up).